
What are the steps to filing legal documents with the court?
What needs to happen between brief and court date to ensure that the document reaches the judge as it should?
What does the filer need to do or know at each phase to ensure success?
If you’ve been filing documents for years now, this step-by-step guide might be too basic for you.
OR, it could be just the return to essentials that you’ve been looking for to improve processes that have been falling behind or becoming too much.
1 – 2 – 3 let’s get ready to file documents with the court.
#1 Finalize your document
Your law firm has worked hard to write up important arguments and clarify critical points on a document that will go before the judge during the course of this case.
Once the writing part is complete, keep in mind best practices for readability. Are arguments organized logically? Is legalese avoided? Are sentences shorter and more direct? Try out our Checklist for editing legal documents to have a reference of best practices at hand.
While the content is critical for effective communication before the judge, you’ll also want to consider formatting requirements from the court, and other best practices for readability. Every legal document has formatting rules, and if the document is to be electronically filed, the standards are even higher.
Don’t worry, we’ve got a checklist for that too. eFiling checklists for your state.
#2 Choose your court filing service provider
Maybe you still work with a court runner, or maybe you’re in the process of choosing a new certified filing service provider. However you plan to get your documents to the court, be sure that you’re working with a premium provider you trust, with a record of reliability.
In states like California, every county has a different approach to using traditional and electronic court filing. One Legal’s program takes the guesswork out of filing for you, choosing the right option based on the court you choose. We eFile where it’s possible and personally deliver your documents everywhere else.
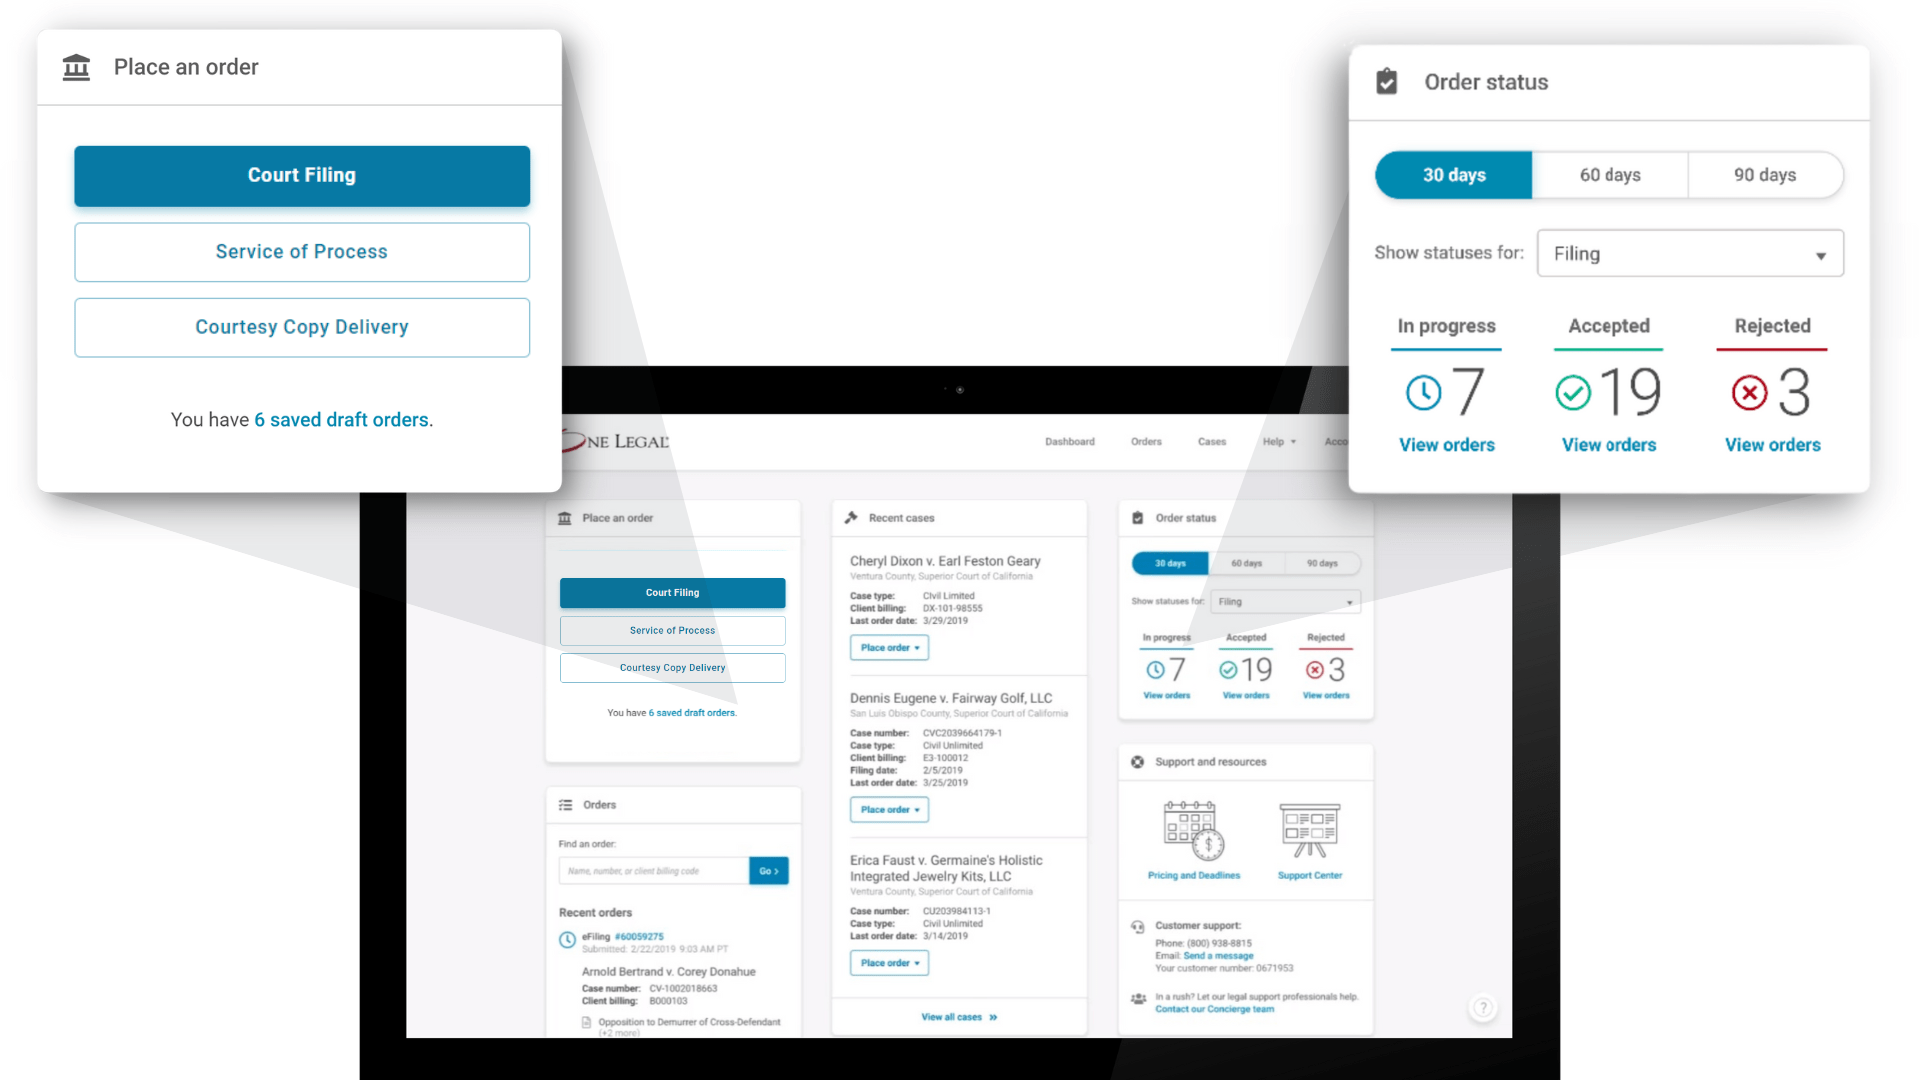
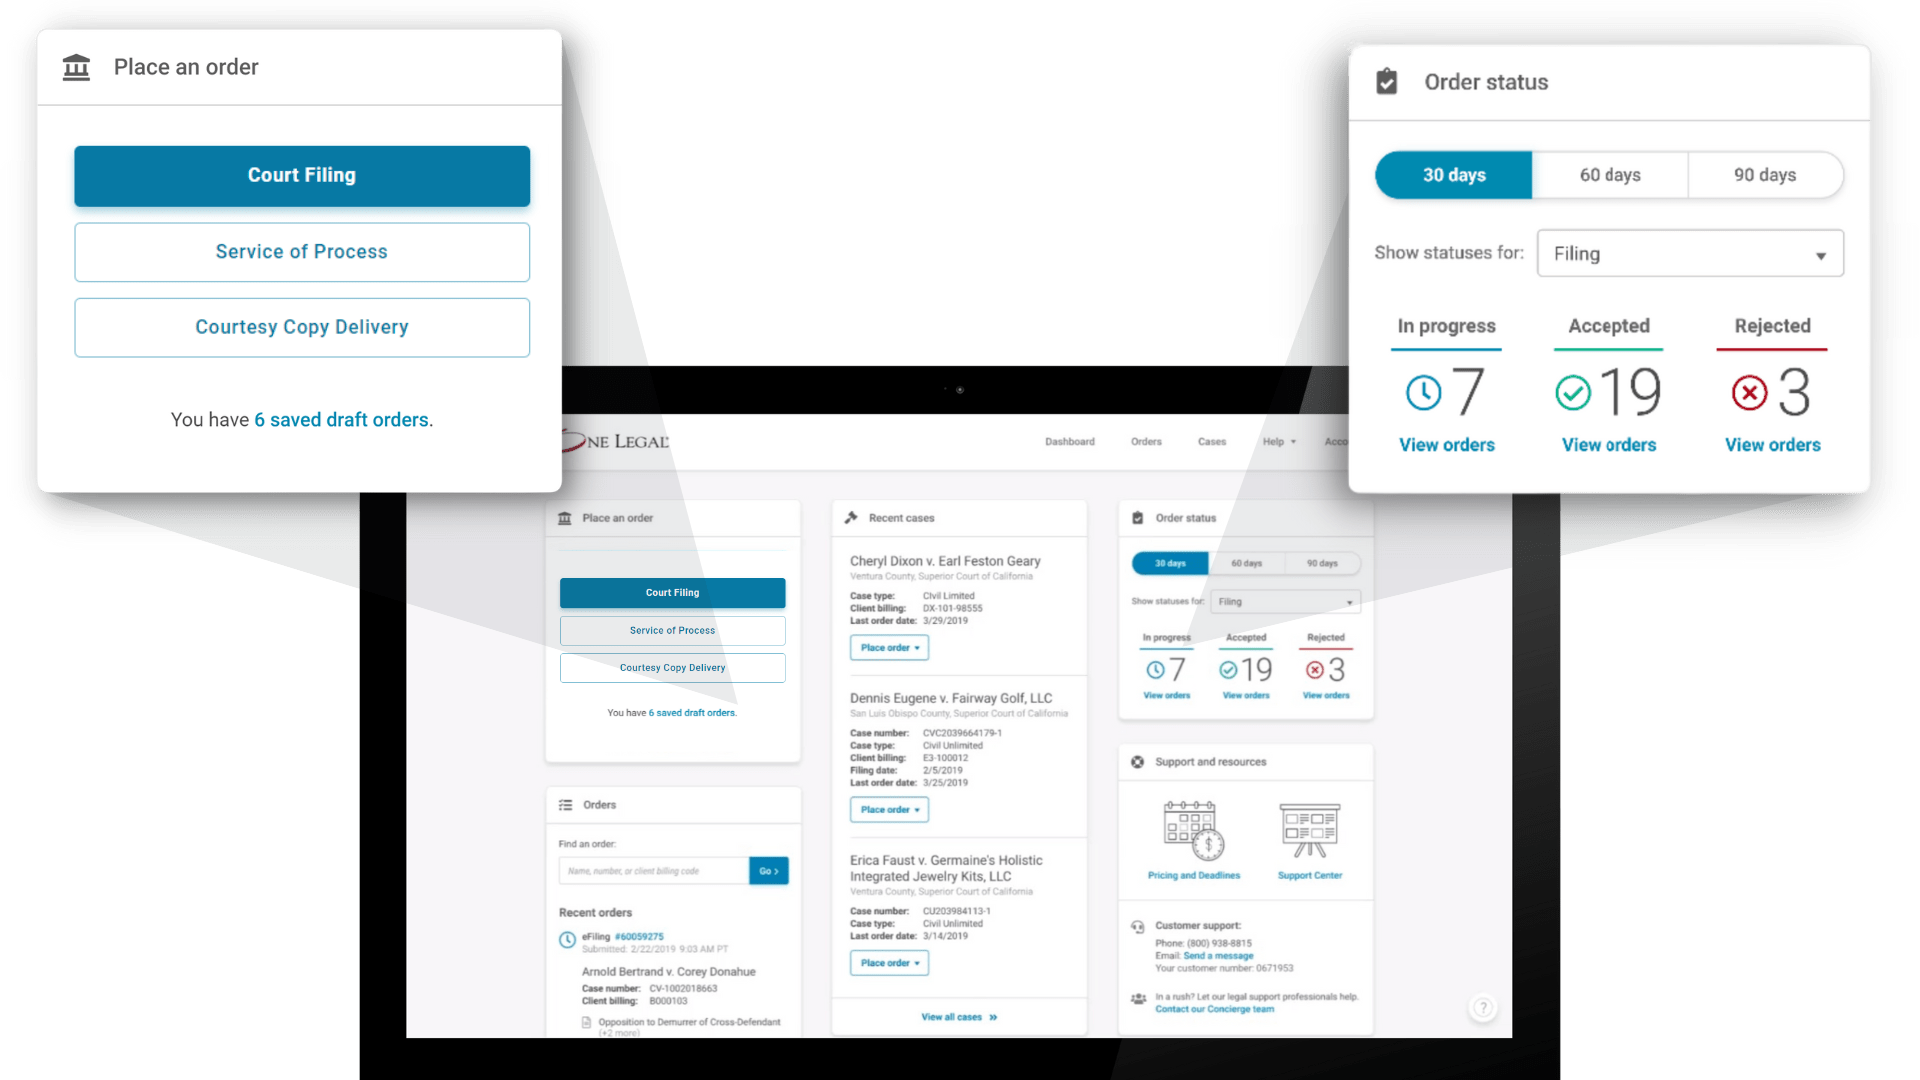
#3 Start a filing
Sign into your preferred provider—One Legal for example. From the start of your filing, One Legal will help you determine whether the court you’re filing into accepts electronic documents or not. In a state like California, where every county sets its own timeline, this can vary from case type to case type.
One Legal’s filing platform was designed based on input from legal support professionals. The goal is to make filing as straightforward as possible. Follow the prompts on the screens to input case information and upload your document.
To see a demonstration of this process, check out our training videos for eFiling and beyond, which can walk you through each and every click.
#4 Check for confirmation
You’ll receive an email with confirmation that your document submission was successful soon after hitting submit. For eFiling, this means that the One Legal system has successfully transmitted your document to the court. For traditional court filing, this means that One Legal has received your document and will soon start assembling, printing, and delivering it to the court.
A status update will also appear in your Order details and overview pages, letting you know where your document is at and what’s next.
#5 Wait for the response
Every order is different in terms of time. An eFiled document may be accepted right away, while a traditionally filed document might not get a response until the next day.
You’ll be notified via email as soon as your document is accepted. Click the link in that email to review the details further.
If your document is rejected, you’ll need to check for a message from the court. You’ll find this on your order details page, below the message from One Legal.
Consider the clerk’s reason for rejection, make the necessary adjustments, and resubmit as a new filing.
#6 Get filed-endorsed copies
On the order details page, you’ll find all the information relevant to your document and your order. This includes access to any returned documents from the court. Check here to find filed-endorsed copies and download as needed.
#7 Repeat
Whether you file legal documents once a month or once an hour, One Legal has developed a system that is ideal for professionals who want flexibility and a comprehensive approach to getting documents to the court.
For more information on how to file legal documents and submit other orders through One Legal, visit the Training page in our Support Center.