

Microsoft Word is one of those programs that you instinctively think you’re a master in, because you likely use it almost every day of your life. Certainly, if you had asked me, after having worked with Word for well over a decade whether there was anything else I could know, I’d have said a firm “no.”
If, like I did, you think of Word as a mere text-based word processor you’re probably only using a small proportion of the software’s tools. To get the most out of Word, and in particular to unlock the features most useful to legal professionals, you need to appreciate that it is, in fact, a full-blown desktop publishing program.
Here are seven of the best tricks that helped me to realize the power of Word — all of which will, I hope, be of use to you in daily life as a busy legal professional. Got more tips of your own? Share them in the comments! I’d love to hear from you.
Note: the screenshots and instructions here refer to Word 2013 for Windows. All are possible in other post-2007 versions, though the process may differ a little.
Free ebook: Troubleshooting Microsoft Word — A guide for legal professionals >>
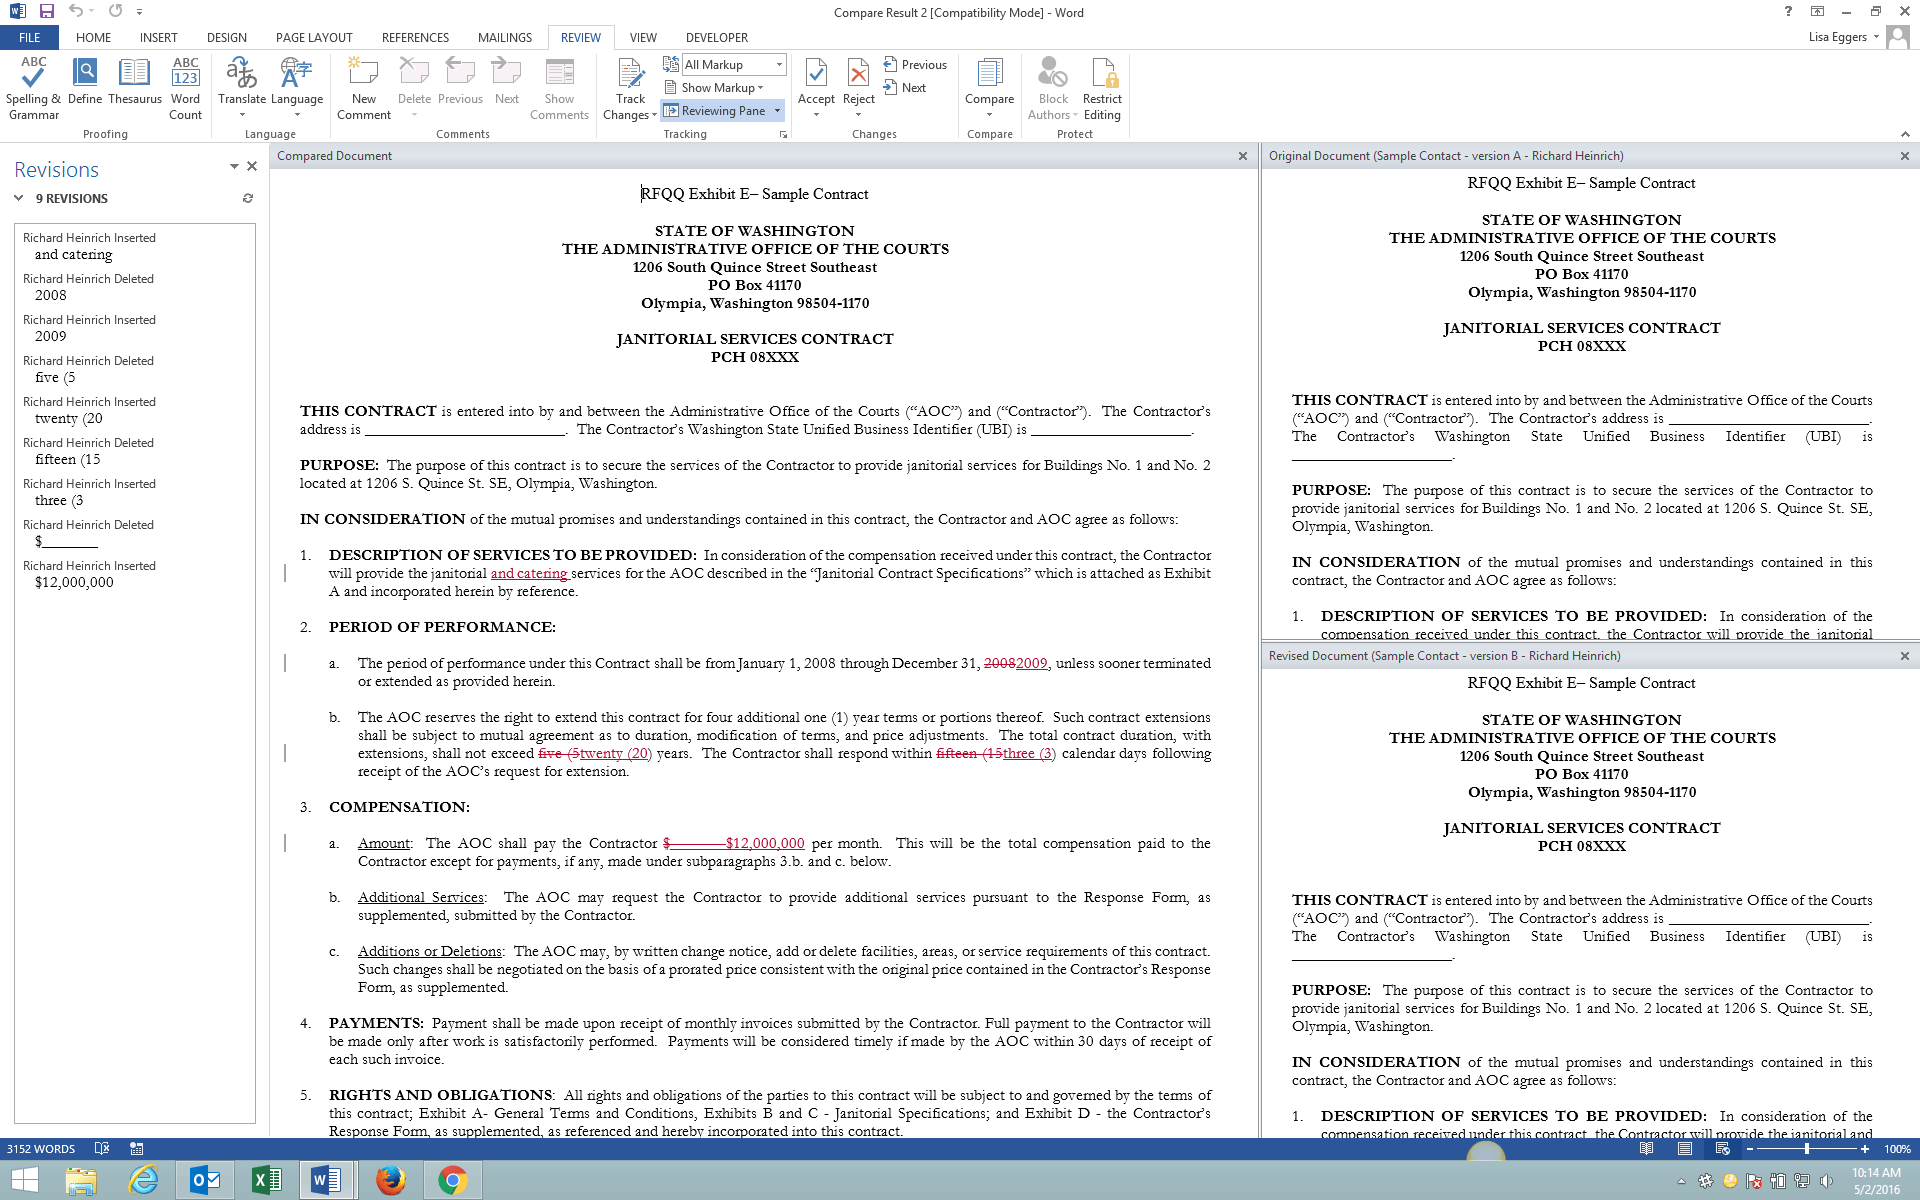
#1 Compare two documents
Comparing two versions of the same document for small differences is a relatively frequent, yet laborious, task in many law offices. Consider, for example, the work involved in reviewing a contract proposed by opposing counsel. Being able to compare the documents side-by-side to spot potentially consequential changes is vital.
Fortunately, Word has a feature for exactly this scenario: The legal blackline option. This feature compares two documents and displays only what changed between them. The legal blackline comparison is displayed by default in a new third document.
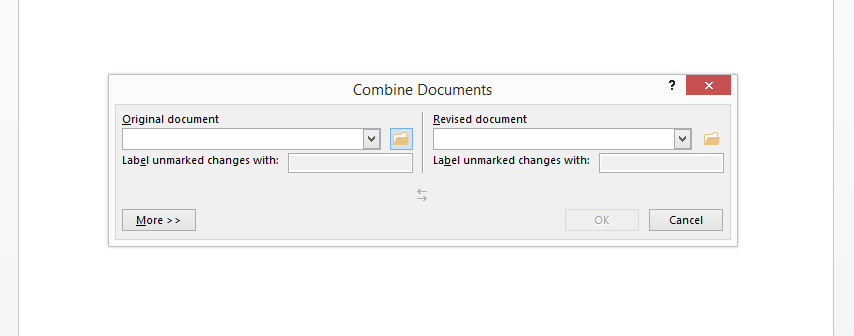
#2 Combine track changes from multiple authors
So you sent out a draft pleading, or whatever, via email to two or more colleagues for comments, and they’ve each sent you back a newly marked-up Word document with tracked changes. Great! Now you need to review each file and cross-check against the original to make all of the necessary changes… actually, you don’t!
Since 2007 Word has contained a feature that allows users to combine multiple sets of tracked changes into a single document, with each of the original changes indicated by a different color markup. I couldn’t believe the time I’d wasted laboriously working through side-by-side Word windows when I discovered this feature! A huge time-saver.
#3 Mark your document as final
Sometimes, after working through many iterations of a document, you’ll want to share it one last time but to discourage any further editing. By default, anyone with access to your document will be able to edit its content unless you protect it.
Fortunately, Word contains a few ways to protect your document to either discourage or prevent editing. In the File > Info tab you’ll see the option to Protect Document. Here you can either “Mark as Final” — which displays a warning message that the document is considered final and should not be edited, though this can be overruled. You can also go a step further and completely restrict edits. Handy, eh?
#4 Use styles
Styles are a huge and important feature in Word. Essentially, a style is a set of defined formatting characteristics that you can use throughout a document. For example, say you want a bold, centered, capitalized heading in size 18 font. Instead of going through all those steps, you can store this formatting in a style and then apply it wherever you need to in your document.
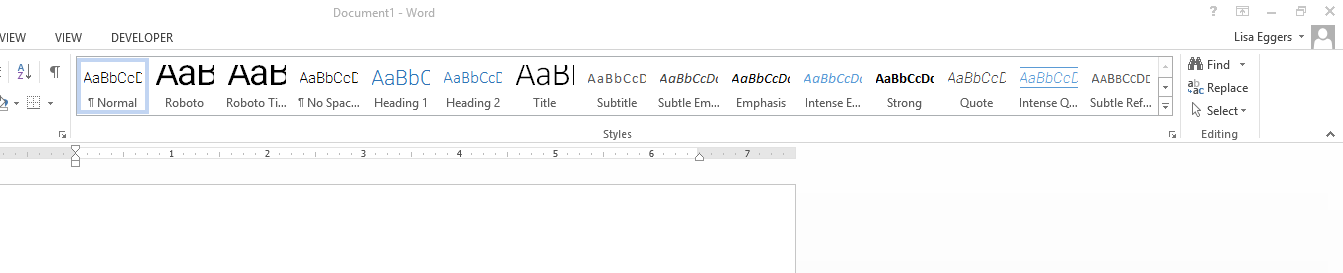
By default, Word will use its “normal” style — a pretty ugly set of blue and black — but in fact comes with 14 style sets to choose from, as well as the ability to edit both colors and fonts. Just click on the change styles button beside on the Home tab. Once you’re happy with your changes, you can save it as your new default by clicking Set as Default.
The law school at Georgetown University have produced a detailed and comprehensive guide to Word Styles — access it here.
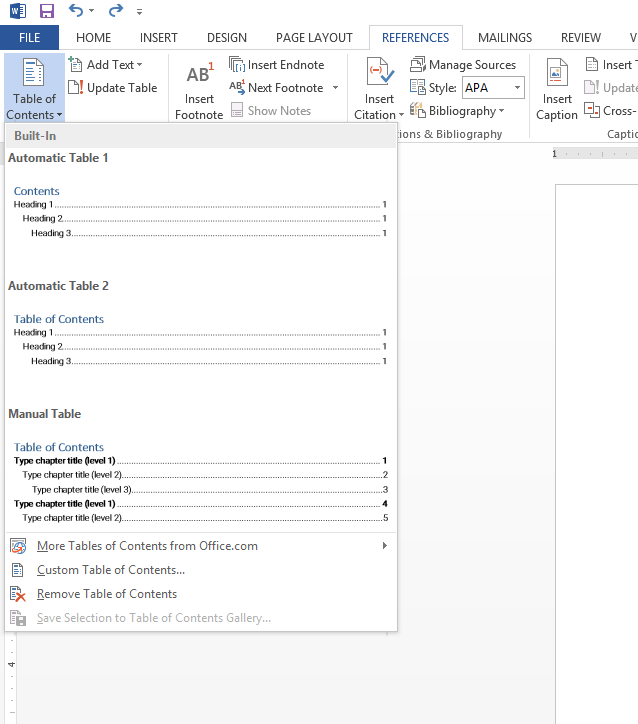
#5 Create a table of contents
One of the most important reasons for using Word’s styles feature correctly is to have it automatically create a table of contents for your document. That’s because, to build a table of contents, Word searches for text that has been formatted as headings. It will detect these headings, sort them by level (heading 1, heading 2, and so on), and then dynamically create a table of contents for your document.
Inserting a table of contents is simple: choose where you want to place the table, click once in that location, go to the References tab, and click on the Table of Contents icon. Once inserted, you can choose the number of levels to display and choose your formatting. Trust me; this is much faster than trying to type out a contents table by hand.
#6 Create a table of authorities
Manually creating a table of authorities — the list of references (cases, statutes, rules, etc.) contained within a legal document — can be a very time-consuming task. Fortunately, Word has some advanced features that can make that process much simpler.
First, you need to mark your citations as such so that Word knows to treat these parts of your document differently. Do this by selecting your citation, visiting the References tab, and clicking on the Mark Citation icon in the Table of Authorities group.
To build a table of authorities, Word searches for marked citations. Once it detects them, it can dynamically create a table of authorities for you! Simply choose where you want your table to appear, click there once, go to the References tab and click on the Insert Table of Authorities icon. There’s a little more to this than there’s space for here, so check out this set of detailed guidelines from the law school at Georgetown University for all the steps.
#7 Save time with keyboard shortcuts!
You might think that learning keyboard shortcuts isn’t worth the effort, but believe me, if you’re working in Word for most of the day you’ll quickly learn to love performing actions with just a few quick keystrokes over clicking around with the mouse. Here’s my top six:
- Ctrl+z = undo
- Ctrl+y = redo
- Ctrl+c = copy
- Ctrl+v = paste
- Ctrl+F3 = changes the case of selected text
- Ctrl+F5 = moves the cursor to the most recent edit
If you’re keen to learn more shortcuts, Microsoft publishes a full list of all of the hundreds of possible Word shortcuts on its support website.